Peach Jam for a lazy day!

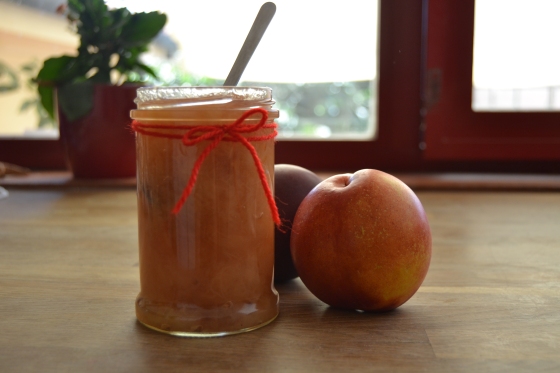
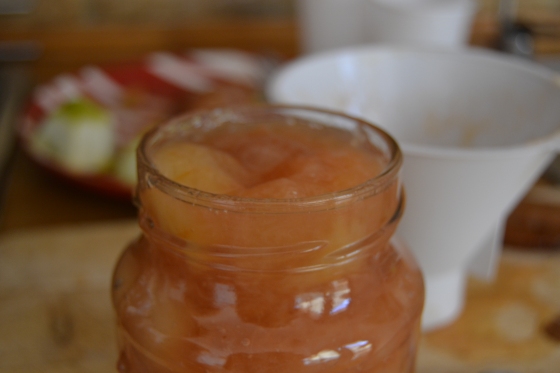
Saturn Peach Jam

Two weeks ago i suggested to Marissa a co-post about summer jam. Cooking jam is my way to take some relaxing time … doing nothing complicated, just peeling fruits, adding sugar and stirring. Maybe while reading a book and … stirring !!! I’ve really needed a day off after months of works at home remodelling it: fixing, covering, painting, moving from a place to place all furniture, choosing parquet floor, placing it and then scrubbing, cleaning and finally set all the furniture back. Now our home starts looking comfortable and in our “home sweet home” way!!!

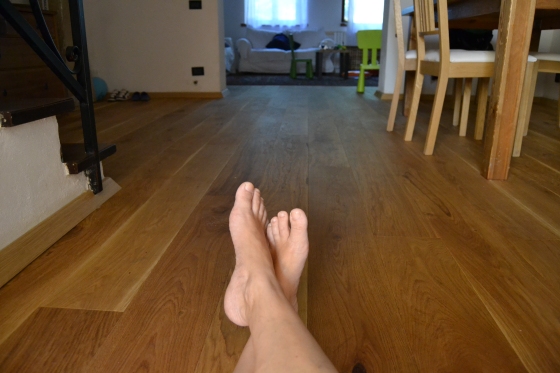
my feet and our new wooden floor

There is still a lot work to do , but we start to see the end!!!

To celebrate this special moment we’ve decided to have a picnic in our living room, sitted on our new wooden floor ( it still smell wood!!!). And having my peach jam as a special guest  … with crepes !!!

Yesterday i went to Pisa, Piazza delle Vettovaglie, a nice square , few minutes from Piazza dei Miracoli, where everyday there is a big market. It is possible to buy delicious fruits and vegetables but also bread, cheese, ham, fresh pasta and sweeties!

Piazza delle Vettovaglie - Pisa  Mercato di frutta in Piazza delle Vettovaglie

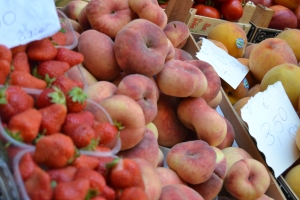
Thinking about my jam, I bought some nectarines, lemons and Saturn Peaches, my favorite variety of peaches. In Italy they are called Pesca Tabacchiera. The fruits are flat, strange to see but really sweet and crunchy. Mmmmm

And then back home to cook !!!

Saturn Peach and Lemon Jam

marmellata di pesche pronta!

1kg Saturn Peaches
400gr of sugar
1 lemon

pesche tabacchiera  pesca tabacchiera  a pezzi!!!

le pesche stanno cuocendo  schiuma durante la cottura  schiumata

Wash peaches, then chop and weigh. In a pot add 400gr of sugar each 1kg of fruit (without stones) weight, mix well, cover and leave the mixture for a night. The morning after set the pot on fire, low heat. During the night syrup comes out from fruits, in this way the cooking time will be shorter! Add the lemon juice. Peeled the lemon and cut the skin in squares and then add to the fruit mixture. Stir constantly. Skim off foam. Cook untill the jam is thick. It is not necessary taking out the lemon skin because it becomes tender! When jam is thick enough, put hot mixture into hot sterilized jars and turn them up side down to cool down.

I use the same recipe to prepare the traditional peach jam !!!

Buon Appetito!!!


Ski days, VOV Recipe and … Bombardino !!!!!!!!!!

It is winter, it means cold weather, heavy jackets, snow and winter sports. While i was thinking with Marissa, my american friend, about our next co-post, we ended talking about how much we love skiing and our habits in this sport. So we have decided to dedicate this co-post about ski days and energizing and restorative recipes. Marissa wrote about a delicious white bean and garlic soup, the perfect food after a cold ski day … her photos are beautiful, and it’s incredible the place where they took them!!!

Ski is one of my passion. I have extra energy when I go skiing, just the idea to be on a ski slope ready to slide down on the snow, make me feel really happy!!!

Valtellina Valtellina
For me skiing has its own habits: a big and nourishing breakfast with coffee, milk, bread, butter, jam or honey, eggs and ham (not usual for us!) and everything with tons of calories, four or five layers of clothes so I can survive both in a snow storm or in a hot bikini ski day, ski wax the night before, wake up very early to take the first ski lift …. maybe the second one!!!

But there is one habit I adore: drinking a “bombardino” ( a small bomb!!!) for breakfast before the first ski slope, it makes me feel strong enough for skiing all the day!!! I tasted it for the first time more than twenty years ago (long time ago) when I started to go skiing with my friends. They brought me to a small cafè close to the ski slopes where they ordered a bombardino. When a creamy and yellowish drink arrived i was hesitant but then i tasted it … I felt in love with it !!! So it become my favorite, sweet ski habit!!!

Bombardino is a more alcoholic and energetic version of VOV.
Vov is a liquor made with yolks, sugar and Marsala wine. It is a kind of alcoholic zabajone. It is very rich in calories for the yolks and it is perfect if you need extra energy. It was created in Veneto, precisely in Padova in 1845. Gian Battista Pezziol, a great confectioner, used to prepare his speciality, the torrone sweet, adding only egg whites. He invented a recipe to use all the yolks remained and …. voila’ the VOV!

It can be served hot in winter time or cold on ice cream in summertime … and a nice, well decorated bottle of Vov  can be a special homemade gift !!!

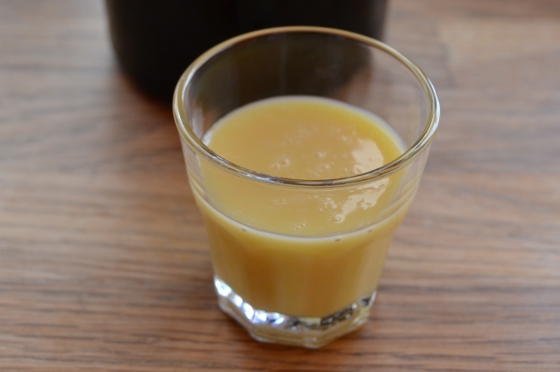
VOV

VOV Recipe

400ml milk
400gr sugar
4 yolks
100ml Marsala wine
100ml alcohol 90*
1 Vanilla Bean

Combine milk and half of the sugar. Add vanilla bean. Heat the milk, it has to boil. Remove from the heat and make it cool down. Beat the yolks with the rest of the sugar, fluffy and soft. When the milk is cold, take out the vanilla bean. Pour the milk in the beaten yolks, stir really well. Add the Marsala wine and stir. Add the alcohol and stir again.
Seep it through a strainer and bottle it. Leave it for 10 days, shaking the bottle everyday. Then …  taste it!!!
It possible to conserve it for about 8 months in the refrigerator.

Now it is time to prepare the bombardino!

Bombardino

2/3  VOV
1/3 Brandy, Rhum or Whisky ( the original recipe is with Whisky, but i love it with Brandy)
Whipped Cream

Heat the VOV and mix it with Brandy. Pour into small cups. Top with whipped cream  and taste it!!!

Try all the recipes (soup, vov and bombardino) and let us know your favorite ski day habits !!!!!!!!!!!!!!!

Buon Appetito!!!!

Lacinato Kale Crostini

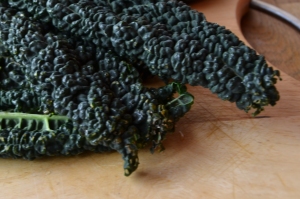
Cavolo Nero or Lacinato Kale … what a strange vegetable!!!

I discovered this crunchy and tasty vegetables ten years ago when I moved to Tuscany. The first time I saw it I was a little bit disappointed about touching the dark green, curly and rugose leaves. They seemed to be an “alien” veggie … a mix between organic staff and hard gum !!!!!!!!!!

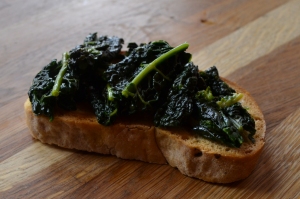
Lacinato Kale  Lacinato Kale Crostini

But when finally I tried them, my idea had to change and I felt in love !!! Now i use a lot the lacinato kale to prepare soups, a nice risotto and some tasty crostini!

Every time I have a dinner with friends or a simple quick lunch with family, I prepare these crostini … sometimes i top them with different ingredients as spicy olive oil, fried bacon or flakes of Pecorino cheese, but always using the basic original recipe !

Thank to Marissa I have learned something new: I was thinking this kind of cabbage was typically from Tuscany and almost unknown in the rest of the world. When she proposed a “lacinato kale post” I had to look in a vocabulary to understand this strange word and, with joy, I’ve discovered it was my adorable “cavolo nero” and it was possible to use it in lots of different recipes as the delicious salad Marissa has prepared for her post!

Thanks to Marissa i’ll try a new delicious salad but also a “new version” of my lacinato kale crostini … with almond and garlic raisin on top!!! An incredible mix of the 2 recipe !!!

Lacinato Kale Crostini

A bunch of Lacinato Kale
2 Cloves Garlic
Extravergine olive oil
Slices of bread ( Tuscan bread if possible!!!)
Rocky salt
Water

Chop the lacinato kale in big pieces. In a pan sauté the garlic in extra verging olive oil until you can smell the garlic ( make attention not to burn it ). Add the lacinato kale, stir and make it fry a little bit. Add water and a pinch of rocky, stir and cover. Let it cook until it became tender, add water if necessary. Drizzle some extravergine olive oil on slices of bread and bake them in the oven for 10 minutes. Top them with cooked lacinato kale. If there is some water left in the pan  put some on the slices of bread before the lacinato kale …  it gives a very good taste!!!

Buon Appetito!

Cantucci for Christmas

I think a little package of homemade biscuits, well decorated and with a fancy tag, it’s the perfect Christmas gift! If you receive it, it tells you a lot about the person who made the gift!

I adore Christmas time and the feelings it creates in me … I enjoy thinking about the right gift for everyone, the decorations and a way to keep this atmosphere alive!
In this lovely mood I can spend all my days baking tons of biscuits and preparing little packages for family and friends … it is my way to tell I care and think about them!!!!!!

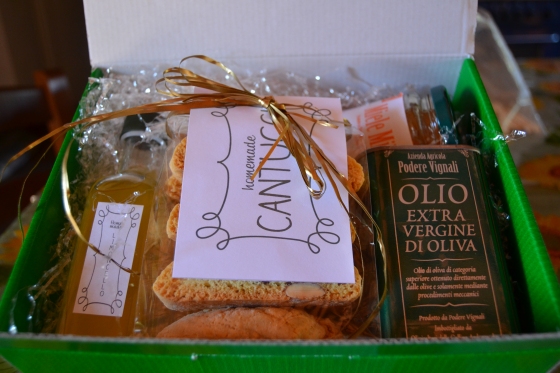
Christmas Gift 2012

This year for Christmas i’ve prepared a green and gold gift box, with a small tin of Olive oil, a jar of golden Honey, a cute bottle of Limoncello and a package of Cantucci.

Cantucci

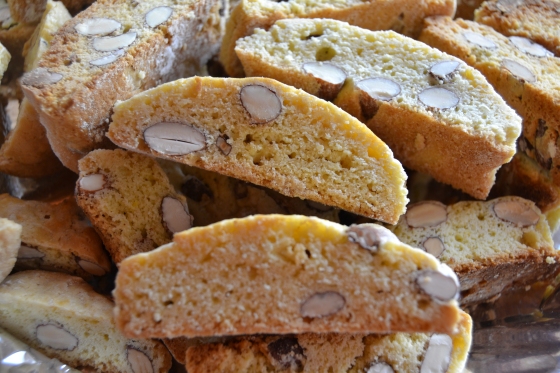
Cantucci are my favorite biscuits and I love to use them as a gift. They are typical Tuscan “biscotti”, prepared with almond … usually they have to be baked crunchy because  the best way to taste these biscuits, it’s dip them in Vin Santo, a sweet, dessert wine … Delicious!!!

When Marissa proposed me to make a “biscuit post”, i could only think about Cantucci, my Christmas biscuits! Here it’s my recipe … but after Marissa’s post i have to confess i have 2 favorite Christmas Biscuits&Cookies : Cantucci and Soft Sugar Cookies!!! I adore our posts Marissa!!!!

Cantucci

50gr Butter
2 Eggs and 3 Yolks
400gr Flour
280gr Sugar
5ml Vanilla Extract
190gr Toasted Almonds (not peeled)
4gr Baking Powder
… a pinch of salt

Pre-heat the oven at 180°C (350F). Melt the butter. In a bowl mix  flour, salt and baking powder. In a second large bowl whisk eggs, yolks and sugar with a mixer until the dough is soft and creamy. Add the butter and whisk. Add the vanilla extract and whisk. Add the dry ingredients and whisk. Finally add the almonds and mix using a wooden spoon.

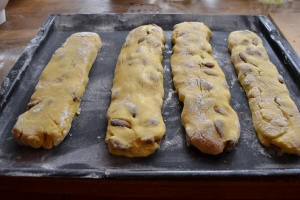
Divide the dough in 3 parts ( 2 parts if you want bigger biscuits) and, on a lightly floured surface, roll each part into a 20cm (8inch) log and about 8-10cm (3-4inch) wide.

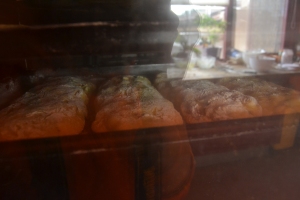
My Homemade Cantucci  Baking Cantucci

Put the logs on a baking sheet and bake for 30 minutes. When ready, remove from oven and let cool them down for 10 minutes . When they are warm, but not cold, on a cutting board, cut logs into slices 1 cm thick using a sharp knife. Place the slices again on the baking sheets and back in the oven for 15minutes at 150°C ( 300°F). The longer you bake them, more crisp and crunchy they will become … I prefer to keep them a little bit soft inside, not too crunchy, and i bake for 15 minutes (as i’ve indicated above), If you like them crunchy let them bake  10 minutes more!

Buon Appetito and Buon Natale !!!!!!!!!

Polenta&Brasato … A special dinner

I love Tuscany and i adore MY life here… but MY roots …
I was born in Como and i lived over there for 25 years. I’m definetively a northern Italy person: sociabile but not too much, expansive but not too much, reserved too much. For the rest of Italy we are too unsociable to deal with !!! I do not care about what people think but at the same time, it bothers me because i’m tired to listen to people complaining about how awfull is going to live in a northern Italy: the weather is horrible ( most of them think there is only fog and rain all the time), the cities are too big and crazy ( Milan is a little bit crazy but it offers a lot of things), people are unpleasant (it’s not true and also it’s possible to find unpleasant persons everywhere!!!) and too reserved (we just think about our friends and family life), the food is always good but not in northern Italy ( we have delicious recipes but simply not known!!!) … Northern Italy has a lot of beautiful qualities and things to show off.
I’m telling all this because last night i’ve invited some tuscan friends for dinner and i’ve prepared some typical dishes from Lombardia (my “birth region”) to show them it was possibile to find something good in Northern Italy!

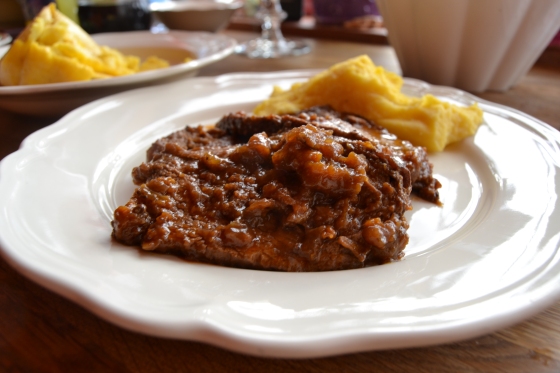
For dinner i’ve prepared polenta&brasato. This dish really remind me MY chilhood, when we used to spend sunday meals with parents&relatives…  Beautiful memories in a beautiful place!!!

Polenta&Brasato

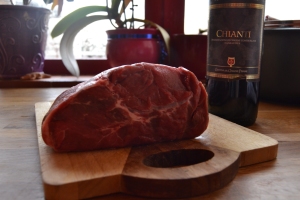
Brasato (Braised Meat) is an easy recipe but very tasty, it’s perferct for wintertime!!! You just need a lot of time (preparation + 4 hours cooking) because the meat has to cook slowly in the sauce made with tomatoes sauce or red wine. A good cut of meat for braising is the shoulder of the animal (we call it “cappello da prete“).
The “Brasato meat” is perfect served with polenta or mashed potatoes.

Here the recipe from My grandmother cookboook!!!

Brasato al Vino Rosso … recipe for 6 persons

2kg  Beef Meat … the entire piece
1lt  good Red Wine ( i used Chianti but also Barolo … i love mixing italian products and recipes)
a big Onion, chopped
2 Carrots, chopped
2 Celery ribs, chopped
a Garlic clove
a can of Diced Tomatoes
a tsp of Clove
a tsp of Nutmeg
extravergine olive oil
a tbs of rocky salt

cappello da prete  soffritto

In a heavy-bottomed pan, add olive oil, carrots, celery, onion and garlic. Using a mixer, mince all the vegetables together. Saute the vegetable mixture, then add the piece of meat. Brown the meat on both side for 5 minutes. Reduce the heat and add the red wine, the diced tomatoes, nutmeg, clove and rocky salt; cover the pan and simmer. Every 45minutes turn the piece of meat and check the level of the braising liquid. The liquid should just barely cover the meat. If you need more liquid (usually a liter of wine is enough) add half of a glass of red wine a time. When ready (the meat has to be tender), cut into slices the meat and serve it with the sauce on.

Buon Appetito!!!
PS. My friends all enjoyed the dinner !!!!!!!!!!!!

Tina&Herman

I like so much my cooking classes!!! It’s always a beatiful occasion to meet special persons.

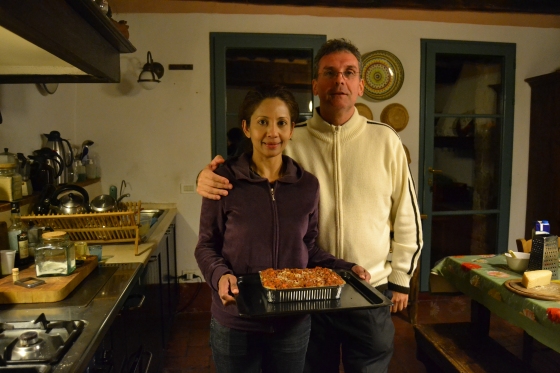
Last Wednesday i organized a cooking lesson for Tina and Herman, a lovely couple that live in Singapore. They were travelling around Italy and they spent a week at Casina di Rosa in Civitella Marittima (Gr) where they knew about my “classes” .

I had a wonderful afternoon with them full of recipes, italian kitchen and a lot of talking about everything. And they payed me a lovely and sweet compliment: ” Giovanna, you make every recipes so easy to prepare!” This is exactly what i want from my lessons, i do not know if i’m a good teacher but i put all my passion in them!!!

Thank you Tina and Herman, i hope to see you soon!

My Baking Day (part2) – Coconut Shortbred Cookies and Raisin Shortbread Cookies

After the chocolate cake, I wanted to bake shortbread cookies.

While I was preparing the dought, i’ve decided to add some new ingredient for a little “special touch”. My mind started thinking, i could hear its noise, a kind of “…. Mumble mumble … “. I opened the closet and I found a dry coconut jar and a raisin jar, “why not to try with one of these?” I thought … “Which one?” … Mumble mumble again … “But it is my baking day so I’ll try both!!!” … et voila’: 2 differents types of shortbread cookies!

And these are my experiments:

Coconut Shortbread Cookies

and Raisin Shortbread Cookies

Not perfect but not bad, especially the one with dry coconut, it gives a sweeter touch!!!

Coconut or Raisin Shortbread Cookies

2 cups of flour
1/4 teaspoon of salt
1 cup of butter at room temperature
1/2 cup of superfine white sugar
1 teaspoon of vanillina or vanilla extract
3 tablespoon of dry coconut or 3 tablespoons of raisin

Mix the flour and salt in a bowl and set aside. Beat the butter until soft and creamy, then add sugar and beat untill the dough becomes very smooth. Add vanillina and mix. Pour the dough in the bowl with flour and salt mixture. Add dry coconut or raisin. Mix really well. Chill the dough in the refrigerator for an hour . Preheat the oven to 180°C ( 356°F). On a lightly floured surface, roll out the dough into a 5cm thick circle. Cut the cookies into the shape you prefer with a cookie cutter. Place them on a baking sheet. Put back in the refrigerator for 15 minutes, it will firm up the dough so the cookies will maintain their shape. Bake them for 10-15minutes, they have to remain lightly brown.

Buon Appetito!!!

My Baking day (part 1) – Chocolate Cake

Sometimes i take a day off from everything, i wear my apron and my kitchen becomes my world: my baking day!

I love it, it is MY time for me and my passion, I can prepare cakes, cookies and biscuits using “already tested” recipes, try new one, taste new ingredients and mix them for MY recipes … I adore my baking day!!!

Yesterday afternoon I dedicated my baking time to prepare a cake following an old recipe, a chocolate cake recipe, and modify another one, shortbread cookies recipe.

I founded the choco cake recipe in a nice old cookbook long time ago, i’ve tasted it so many time but it has never bothered me. It is a fantastic chocolate cake, a little bit chewy, as i like it, with no cocoa powdered but real dark chocolate !!!

Chocolate Cake

200gr dark chocolate
100gr butter
3 eggs
3 tablespoons of flour
200gr castor sugar

Cut the dark chocolate in pieces. Put the pieces of choccolate with the butter in a double saucepan and melt them. In a bowl beat yolks with sugar and then add flour. Beat until stiff the egg whites. Add the chocolate and butter mix with the yolks and sugar mix, add the beaten egg whites. Mix very well all the ingredients. Pour the batter in a pan and bake it in the oven to 180°C ( 356°F) for 25-30 minutes. Serve it with confectioners’ sugar on top.

Buon Appetito!!!
Meet Marissa, an american friend and her Caesar Salad recipe

I’m so excited: with this post Marissa and i start an “American-Italian Post Project”. We want to write every month a post about food, culture, traditions and our life in our own country. Same arguments from two point of view. I love the idea to create this virtual bridge between us and discover what will happen.

Marissa is an american friend of mine. She has a beautiful food blog, called PinchandSwirl. In her blog she talks a little bit about her life but, above all, about delicious recipes she prepares, a mix of american, italian and international dishes, always with a her personal touch. All the posts have something more: her beautiful photos!

I met Marissa a year ago. Marissa and her husband Keith spent 65 days around Italy, visiting Venice, Bologna, Florence and Tuscany, Roma and more, and sharing all their experiences in their blog 65 days in Italy. During this trip they stopped at Podere Vignali where i organized a cooking class for them.

We had a beautiful time cooking and talking about food, traditions and our countries. I was so proud of my job when they talked about me in their blog and their travel guide. After that time we kept in touch via email. We get long well and i feel comfortable talking to her, probably because, like me, she moved a lot in her life living in different cities and learning a lot from those experiences. Marissa writes in her blog ” I live in Bend, Oregon, graduated from college in Idaho, and grew up in California. Before Bend I lived in Seattle, where I worked with my husband to restore a 1921 Craftsman Bungalow – so I’m handy with a hammer and a kitchen knife”.

I like her kindness and her way to observe the world around … and also i like her recipe! To open this series of posts i decided to prepare one of her recipe “Chopped Caesar Salad with Crispy Capers and Giant Croutons“, an american recipe with italian origin and her touch!

Chopped Caesar Salad with Crispy Capers and Giant Croutons

Here Marissa’s recipe for Caesar Salad from her blog:

Crispy capers and giant croutons:
1/4 cup capers, rinsed and patted dry
4 slices (1/2 inch) whole wheat sourdough or whole grain peasant loaf … i used unsalted tuscan Bread
olive oil for tossing/drizzling

For the dressing:
2 small garlic cloves, minced
2 anchovies (optional – Worcestershire sauce gives a slight anchovy flavor)
1 egg yolk
1/4 cup lemon juice, preferably fresh
1/2 teaspoon Worcestershire sauce
1/2 cup grated Parmesan cheese plus extra to shave over salad (preferably Parmigiano-Reggiano or Grana Padano)
1/2 cup extra virgin olive oil

For the salad:
2 romaine lettuce hearts, chopped
2 hard boiled eggs, chopped

Preheat oven to 375 degrees.

Place capers in a small bowl and add about 1 teaspoon of olive oil; toss to coat.

Line a rimmed baking sheet with parchment paper. Arrange bread slices on one half of the baking sheet and sprinkle capers in a single layer on the other. Drizzle bread slices with olive oil. Bake for 15 minutes or until bread is golden brown and capers are crispy. Remove from oven and set aside to cool.

Add all dressing ingredients except oil – garlic through Parmesan cheese – to the pitcher of a blender; puree. With blender running, slowly add olive oil and continue to blend until thoroughly combined. Season to taste with salt and freshly ground black pepper.

In a large bowl combine chopped romaine and eggs; toss to combine. Drizzle with desired amount of dressing and toss to coat.

Divide salad between 4 serving bowls. Top each salad with one giant crouton, a sprinkle of crispy capers, and several shavings of Parmesan cheese. Serve.

I start preparing the dressing, then cutting the salad, toasting the bread and the capers. After combining all , we had delicious salad for lunch … Very good!!! Bravissima Marissa !!!

Buon Appetito !!!

I hope you like this post and all the posts will come after !!! But now read Marissa lovely post Authentic Italian Ragu&Meet Giovanna

SEE YOU SOON … A PRESTO!!

Linguine with Arselle … without Linguine

Last night my dinner was smelling like sea breeze, how poetic i am!!!, but it was true! We had a big plate full of arselle, small edible mollusks, fished long the Tuscan coast close to Livorno. I don’t know the english name of these mollusks,  the name should be Truncate Donax, but i know for sure the latin name is Donax trunculus … maybe it can help!!!

These mollusks are really small but they are delicious and a typical recipe  prepared with these mollusks is Linguine with arselle.

Yesterday night my husband and i came back home late, no dinner was ready and we were tired and hungry. Fortunately he arrived with a big basket full of arselle he bought from a local fisherman. When i saw the arselle i ran in the kitchen thinking to prepare the linguine with arselle, but as soon as we finished to cook the arselle, they looked so good that we decided to eat them without the pasta … also my son Marco appreciated them ! Very good dinner !!!!!

Here the complete recipe … very easy !!!!!!

Linguini con le Arselle

Leave the arselle for a day in clean salt water. Saute 2 cutted garlic cloves in extravergine olive oil. Add Arselle and cover. Cook for 15 minutes. Add chopped parsley and stir. Boil some salty water and cook the linguine. When the pasta is ready, drain it and transfer in the pan with the arselle. Toss to coat, heating  just a little bit and serve.

Buon Appetito … with or without linguine !!!